Container Planting
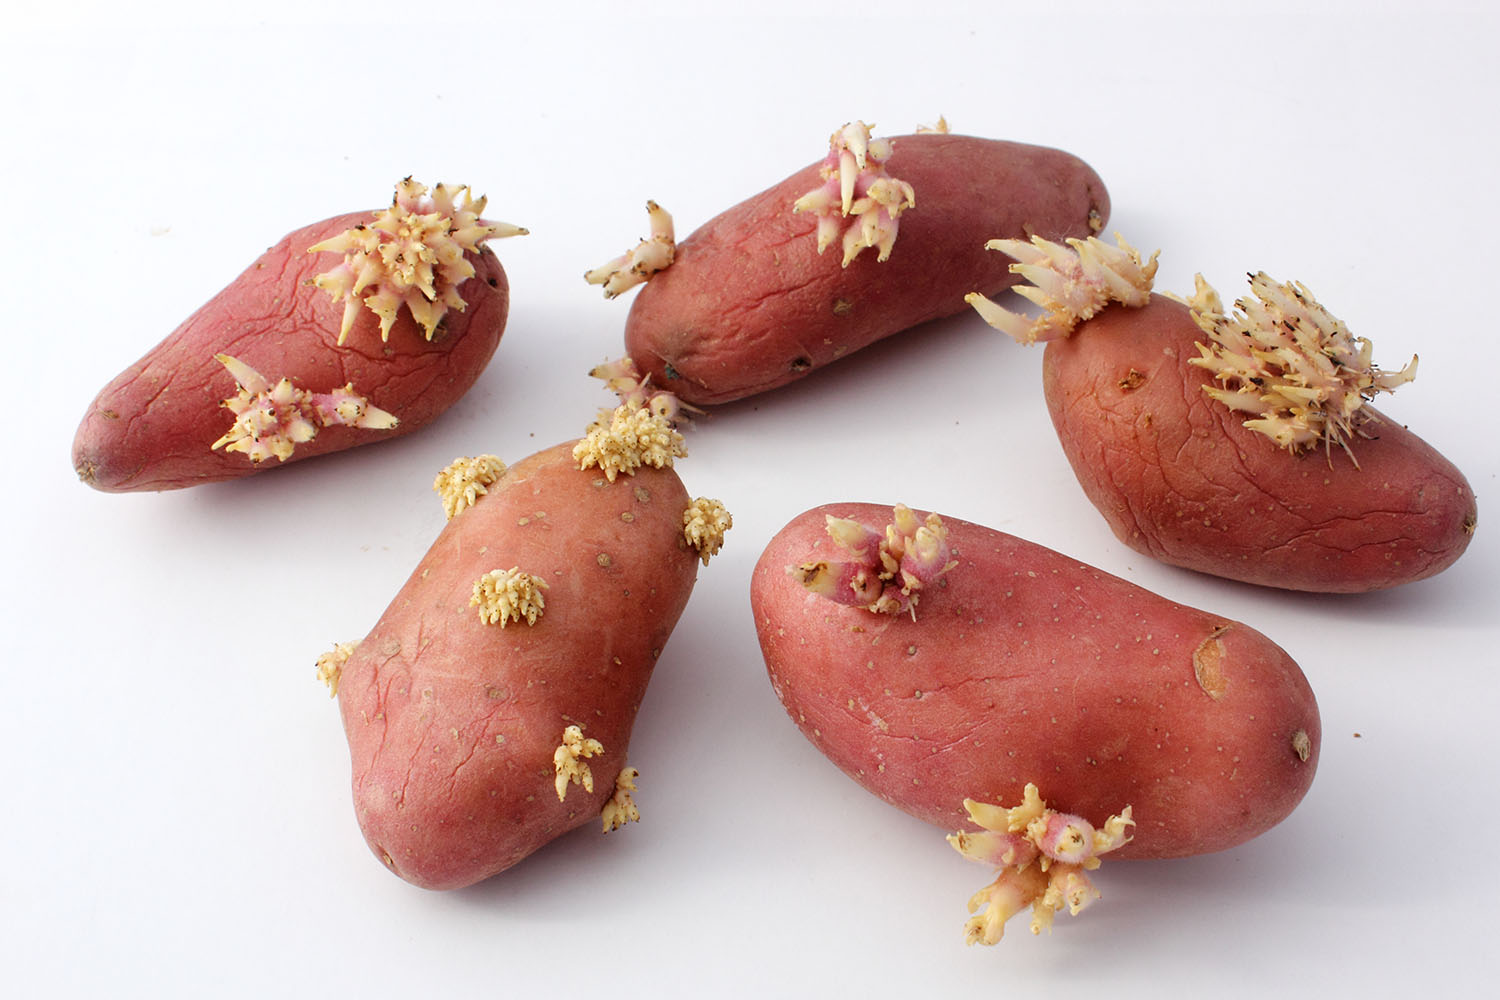
Note: Chitting helps the seed potatoes emerge from the ground faster after planting and leads to better yields.
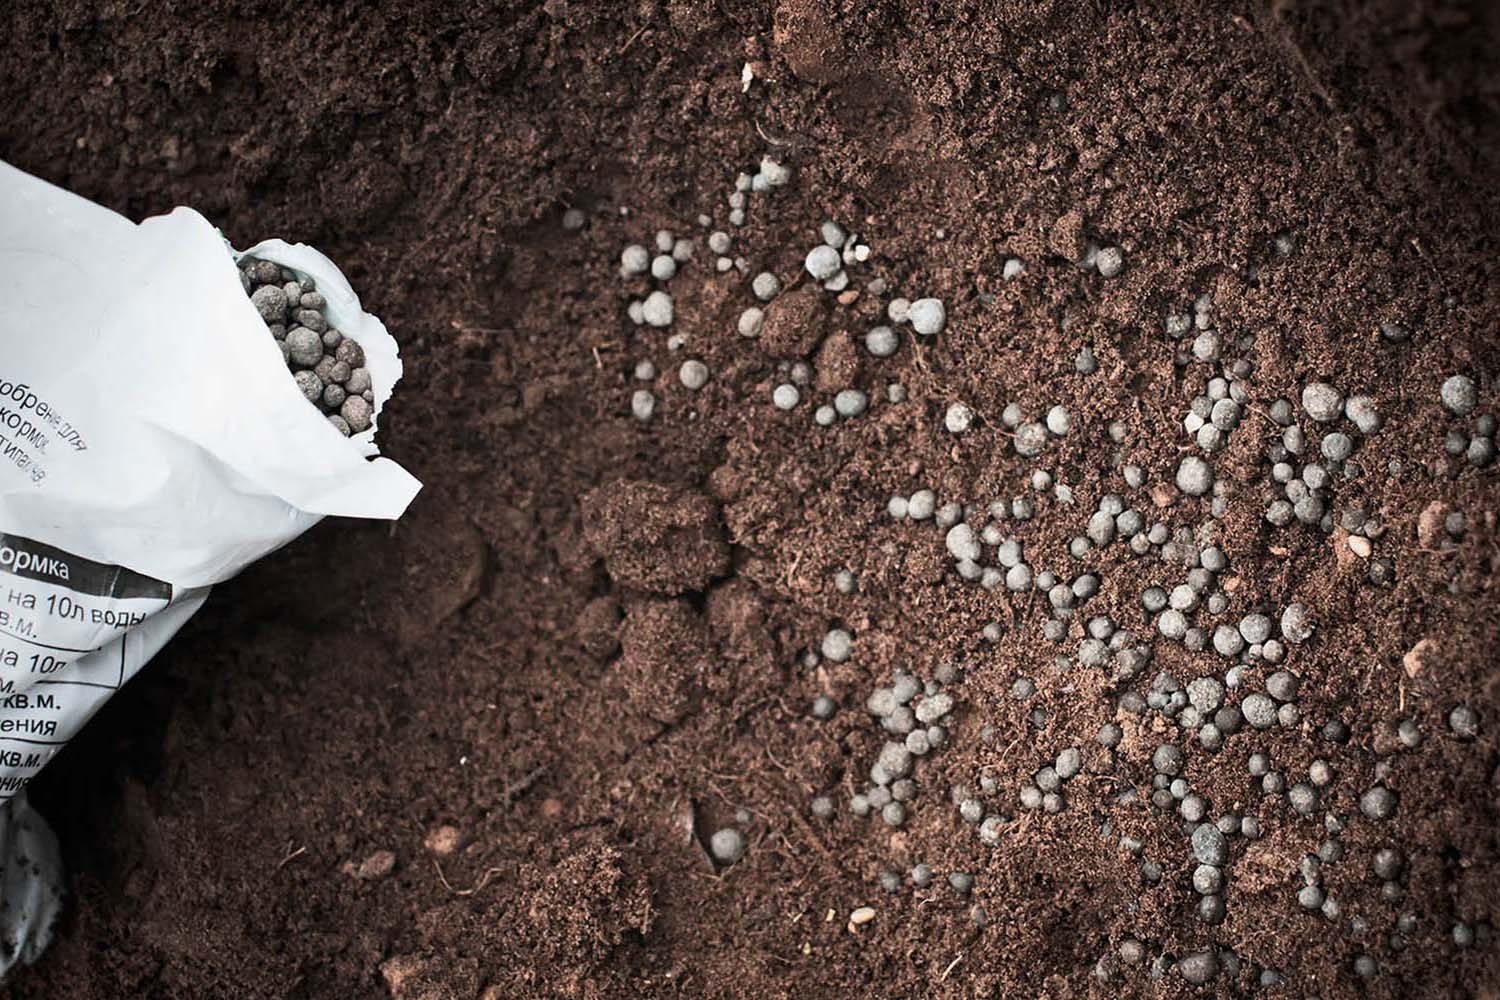
Note: Some potting mixes already have fertilizer mixed in. Consult with your local garden centre for additional fertilizer advice. Avoid giving excessive amounts of Nitrogen to the plant.
Note: it is important that there are drainage holes in the bottom of the containers you are using. If there are none simply drill or punch a few holes in the bottom with a nail or other sharp object.
Note: A large hill creates the ideal environment for potatoes to grow without them being squeezed for space.
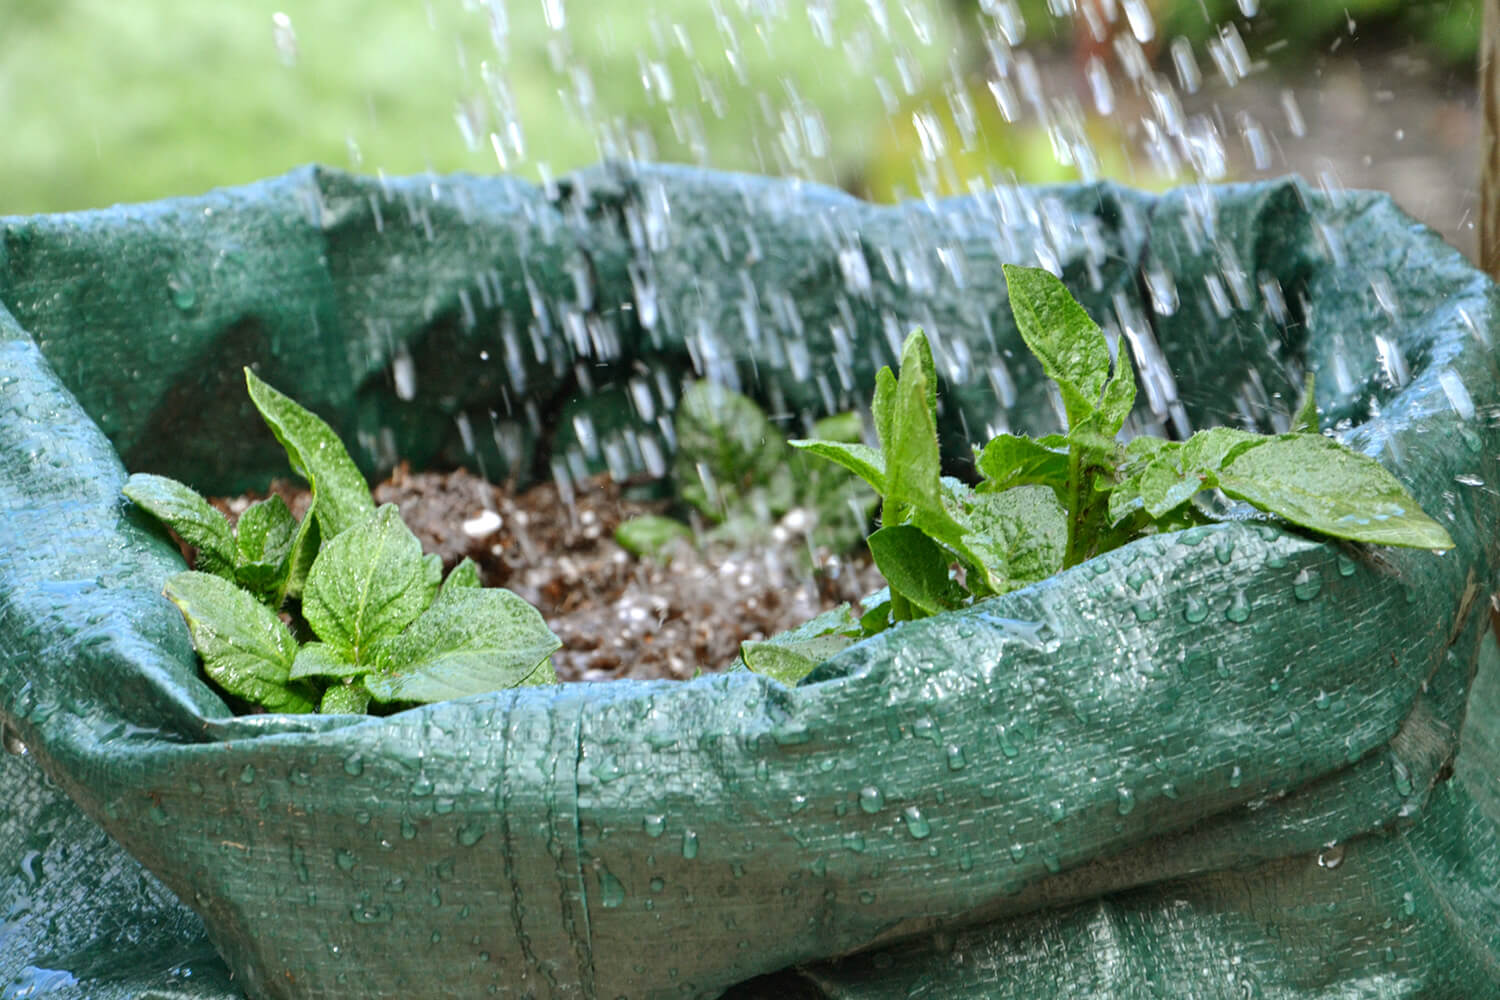
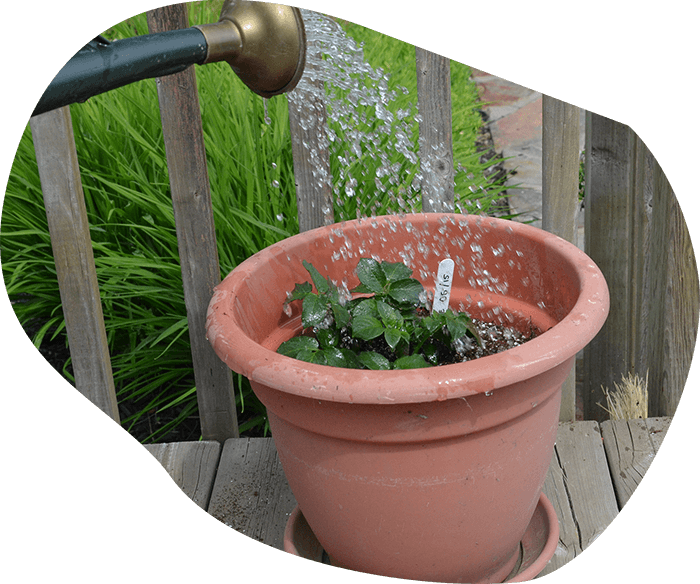
Note: Due to their smaller size, containers will dry out quicker than in a garden, so inspect regularly and give extra water where needed.
Note: When placing multiple containers together, try to prevent the mature plants from crowding together. Ensure they are spaced apart to allow adequate ventilation through the leaves of the plants
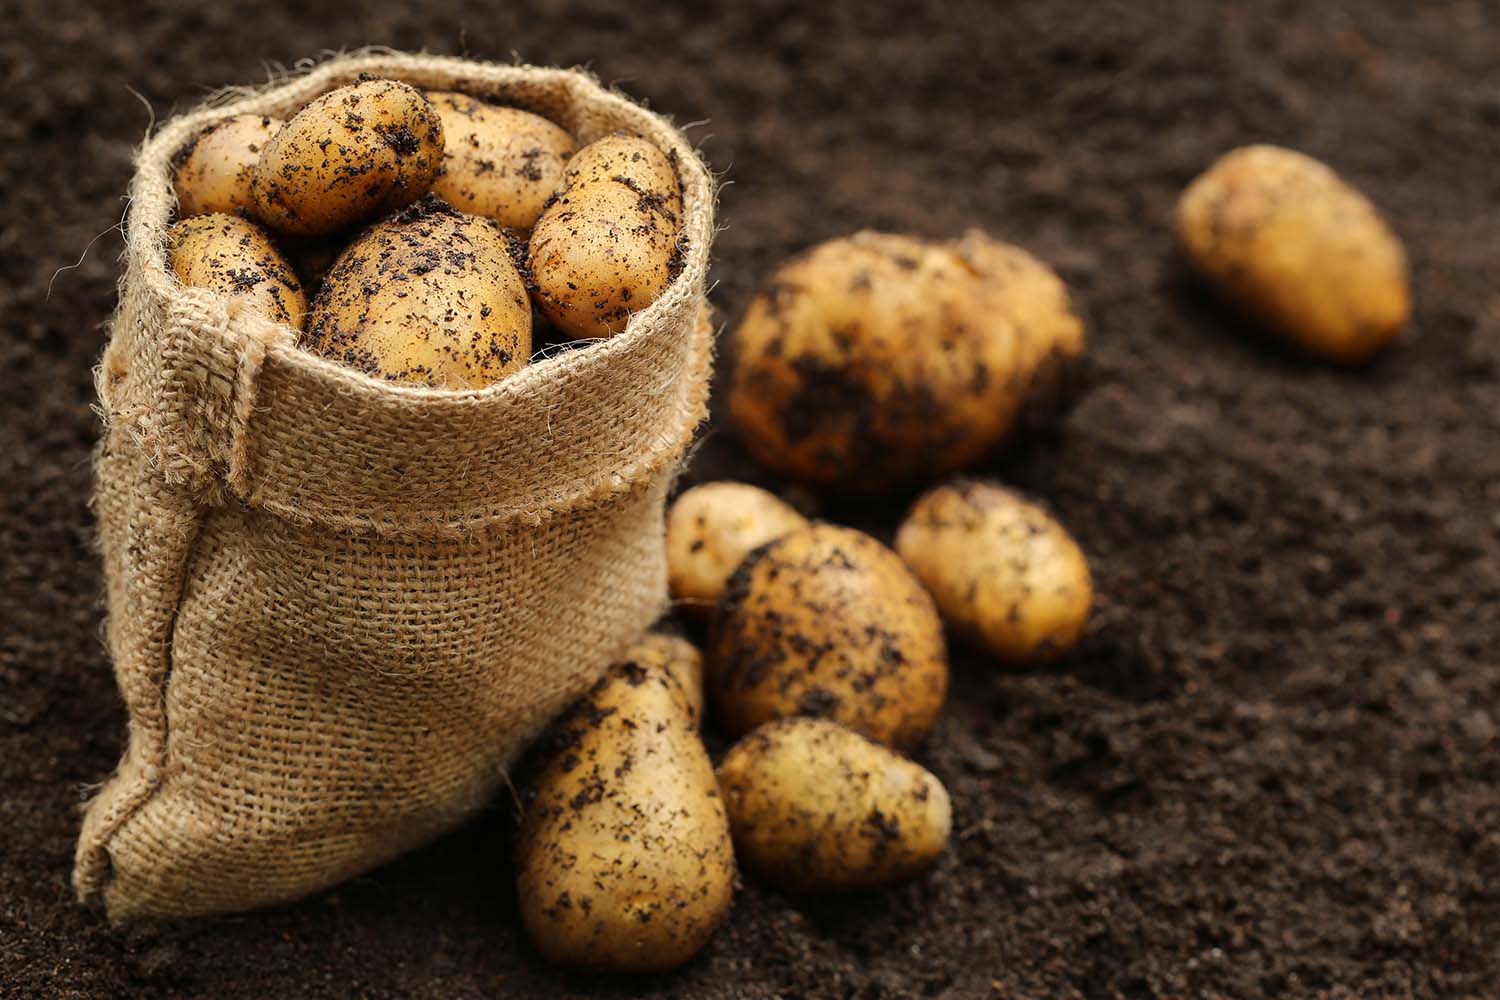
Note: There is nothing more delicious than eating freshly dug EarthApples potatoes. Enjoy!

Growing EarthApples in confined spaces is an excellent method to produce your own crop of fresh potatoes. This guide will help you make the most of your limited space. Planting in containers is an easy way to grow fresh potatoes.
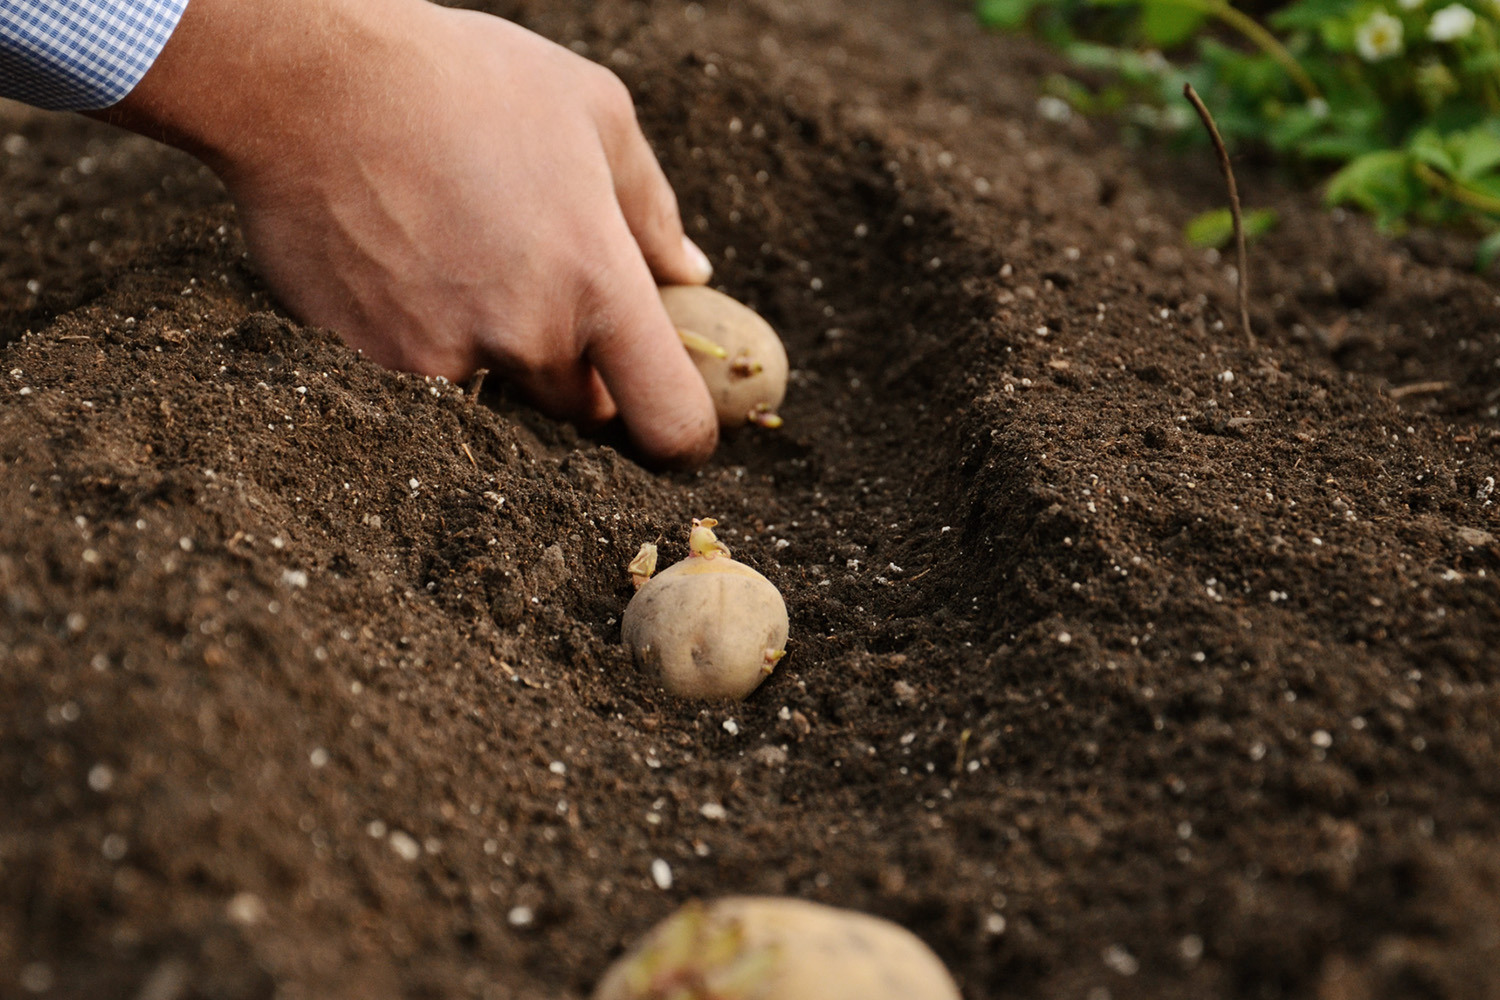
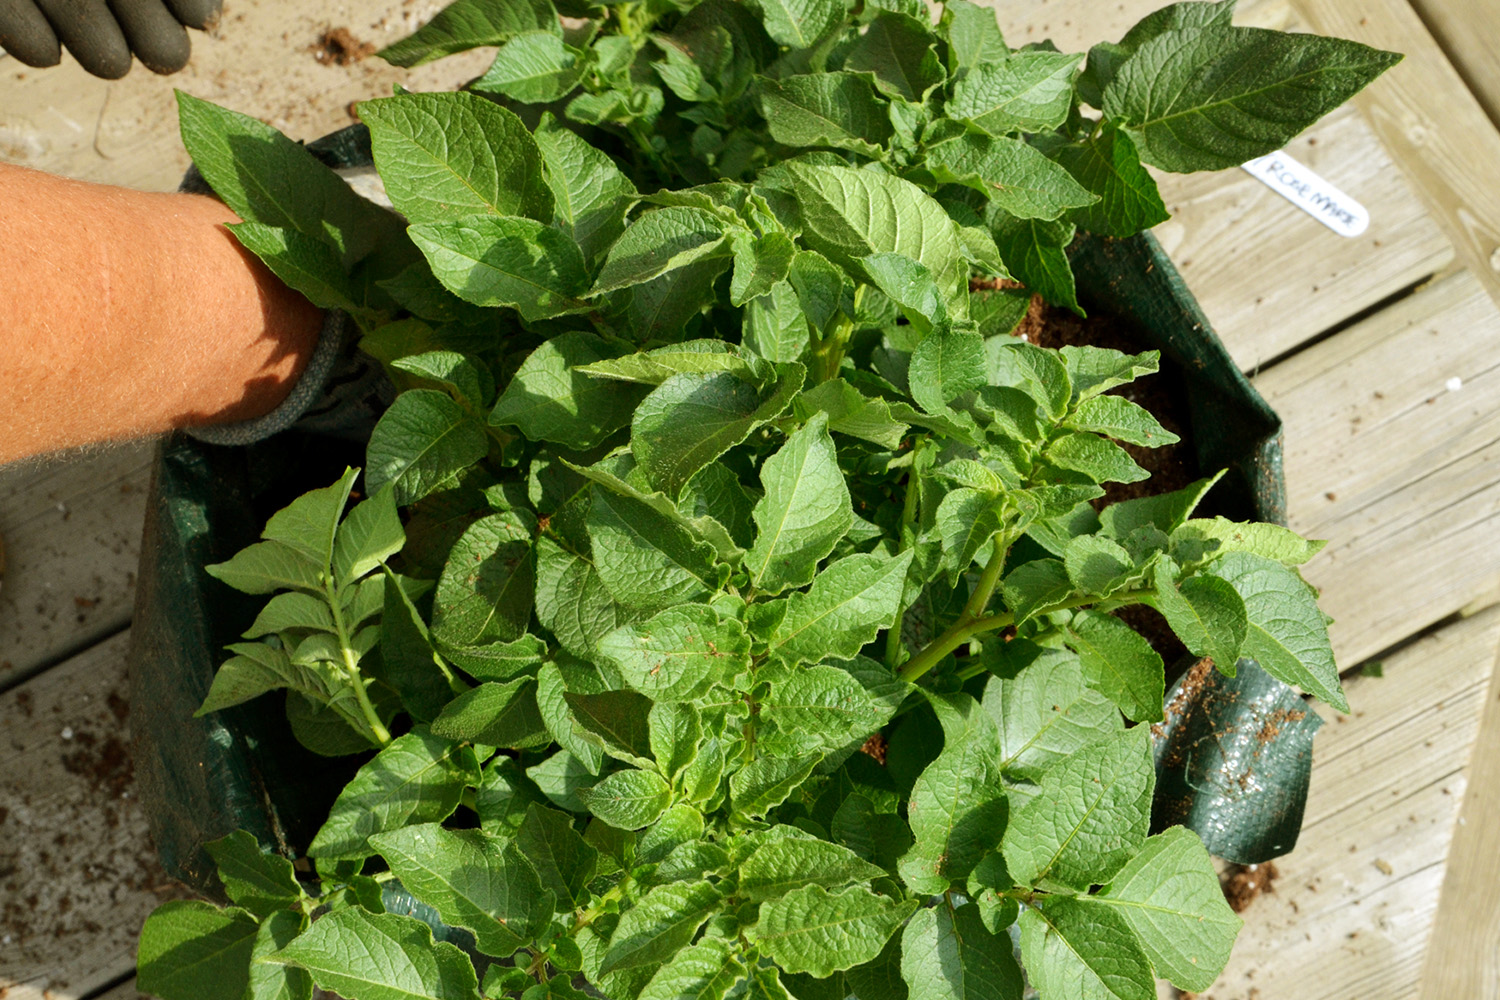
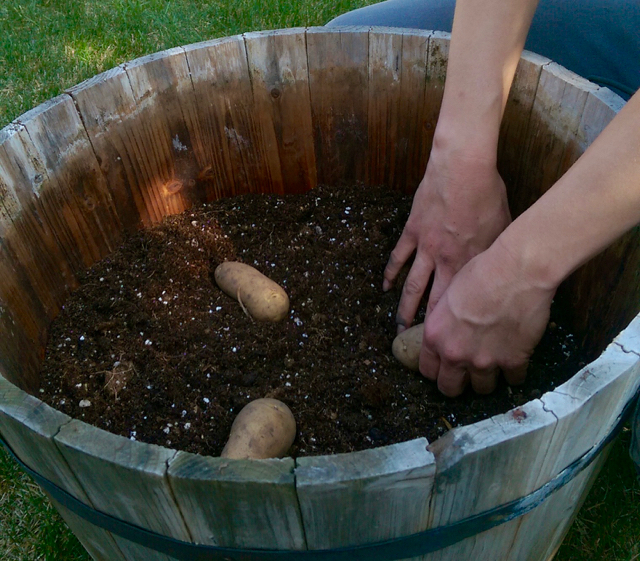 Planting the EarthApples tubers. The size of container will ultimately determine how many tubers to plant in each container. Refer to the varieties specific spacing recommendations as a guide. Place the whole – un-cut – seed potatoes on the soil with the larger sprouts facing up. Cover the seed potatoes with 2-3 inches of potting soil and pack lightly. (Do not cover the potatoes with excess soil at this stage as this will only delay plant emergence.) Place the container in an area where it will receive adequate sunlight.
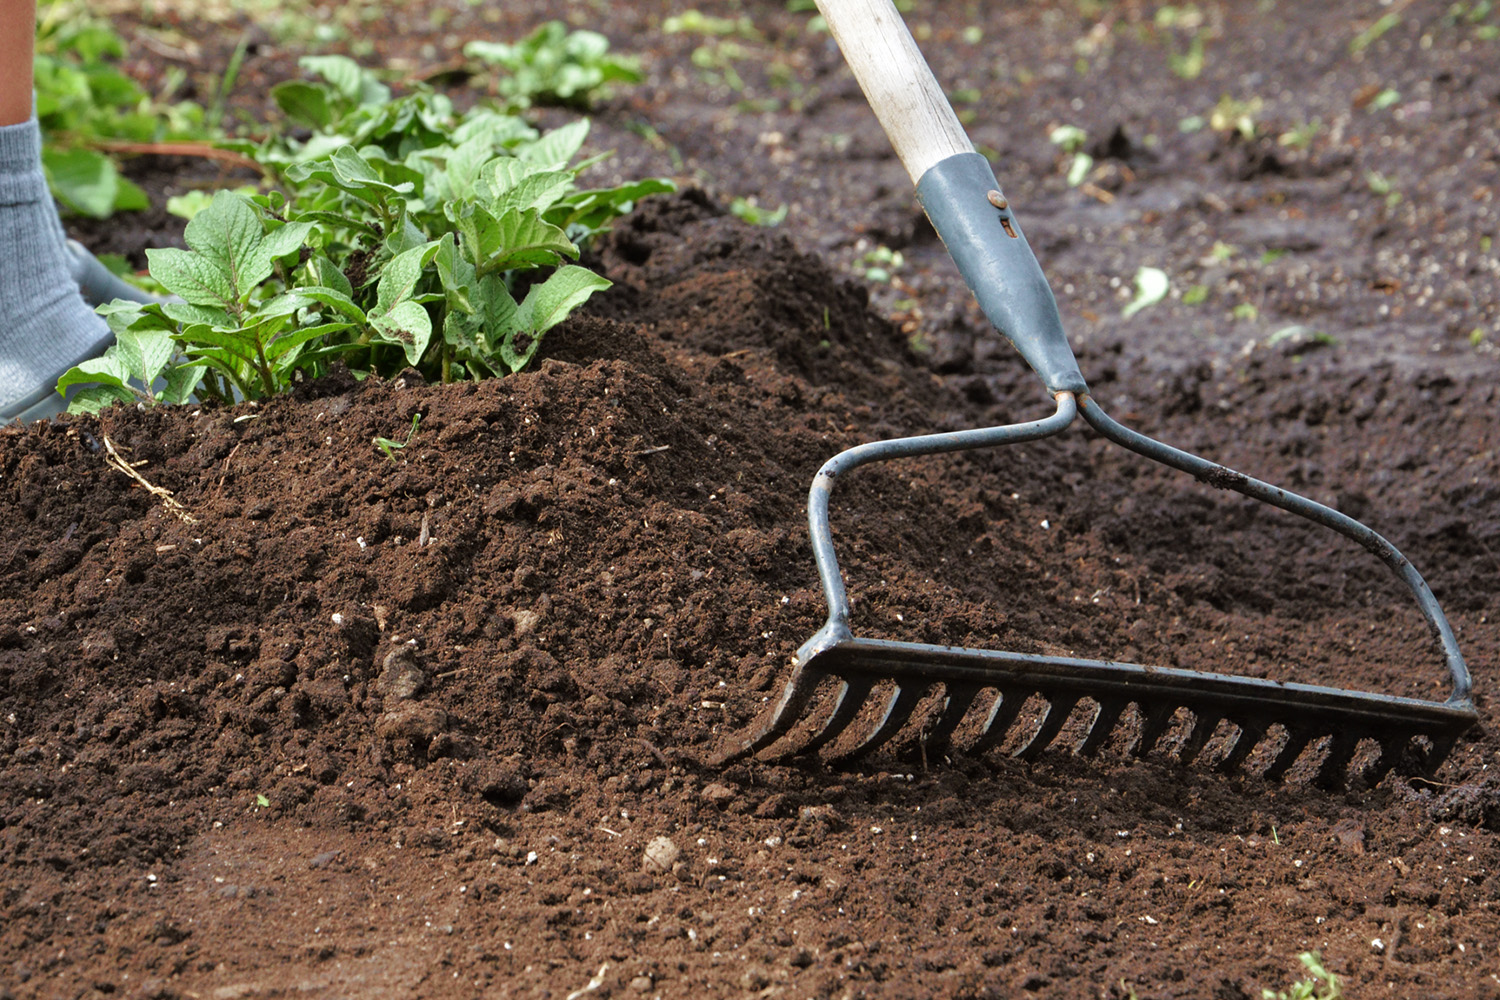
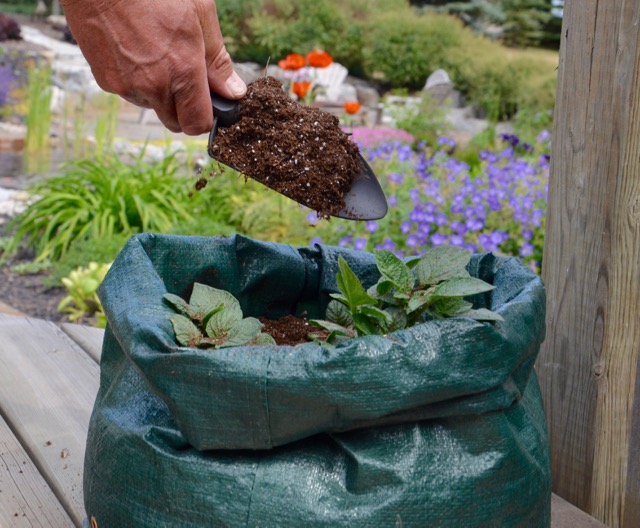 When the plants have grown between 4-6 inches tall add another 3-4 inches of soil around the plants. Lightly brush away any soil around the leaves to keep them exposed to the sunlight. As the plants continue to grow you should add soil periodically until you have reached the top of the container.
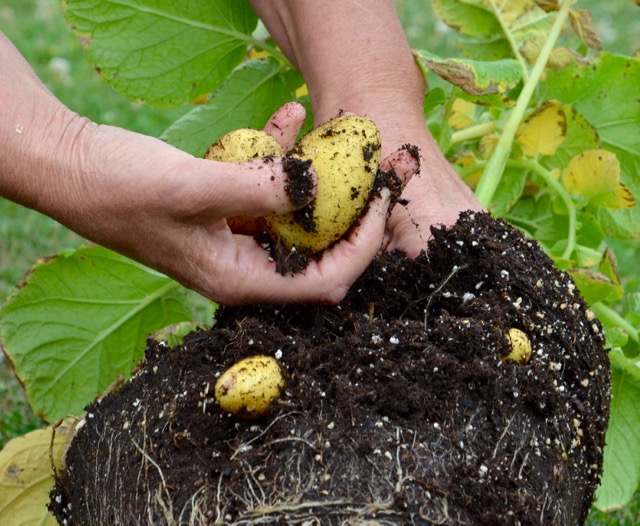 Generally speaking, early varieties will be ready for harvest around early august with mid-season varieties ready at the beginning of September. If the plants are still green try to do a test dig in the dirt to unearth a few new tubers. This will give you a good indication if you should let them grow a bit more or if the size of the potatoes is to your preference. At the end of the growing season plants will naturally start to ripen and turn light green and yellow indicating they are ready for harvest. For storage potatoes, let the potatoes sit in the soil undisturbed without watering them for about 2 weeks. This allows the skin on the potatoes to set which reduces skinning and prolongs the storage life of your potatoes.
Growing your EarthApples in a garden is easy and this step by step guide will help you to get the absolute best results for your EarthApples. When the weather is favourable in your area about mid spring, and after the risk of night frost has passed, it’s time to start planting and put these gems to work!
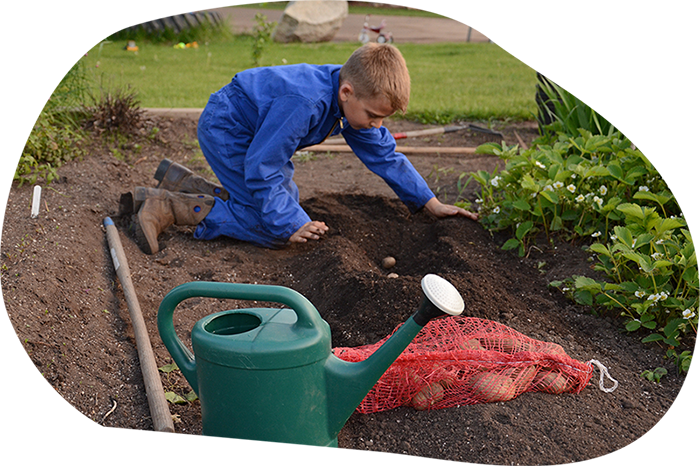
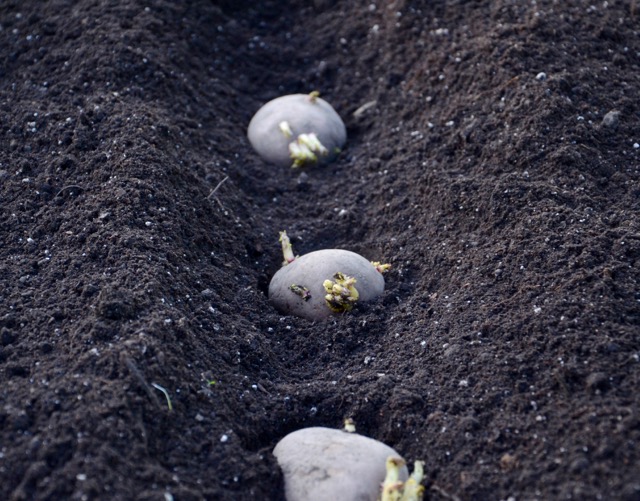 Dig a trench about 4 inches deep in he soil. Take your EarthApples and lay them in the trench with the larger sprouts facing upwards. Refer to the varieties specific spacing recommendations as a guide. Cover the seed potatoes with about 2-3 inches of soil. Do not cover the potatoes with excess soil at this stage as this will only delay plant emergence.
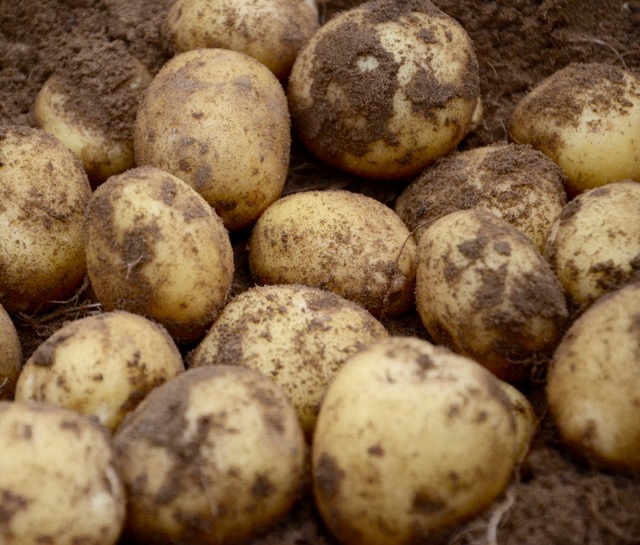 Generally speaking, early varieties will be ready for harvest around early august with mid-season varieties ready at the beginning of September. If the plants are still green try to do a test dig in the soil to unearth a few new tubers. This will give you a good indication if you should let them grow a bit more or if the size of the potatoes is to your preference. At the end of the growing season plants will naturally start to ripen and turn light green and yellow indicating they are ready for harvest. For storage potatoes, let the potatoes sit in the soil undisturbed without watering them for about a week. This allows the skin on the potatoes to set which reduces skinning and prolongs the storage life of your potatoes.
 There is nothing more satisfying than growing your own organic potatoes. Knowing that you have prepared a meal of your very own nutritious organically grown potatoes is a very assuring feeling. EarthApples have been specifically selected to perform well under organic conditions. Here are some tips to increase your success for a healthy crop of organic EarthApples.
Pests can cause damage to your potato plants and crop. It is important to regularly inspect your plants to make sure there are no problems developing. This is especially important if you are growing your crop organically. It is better to control the problem at an early stage then to try and do damage control later on. Common pests to watch for are the Colorado Potato Beetle, Aphids and the Wireworm.
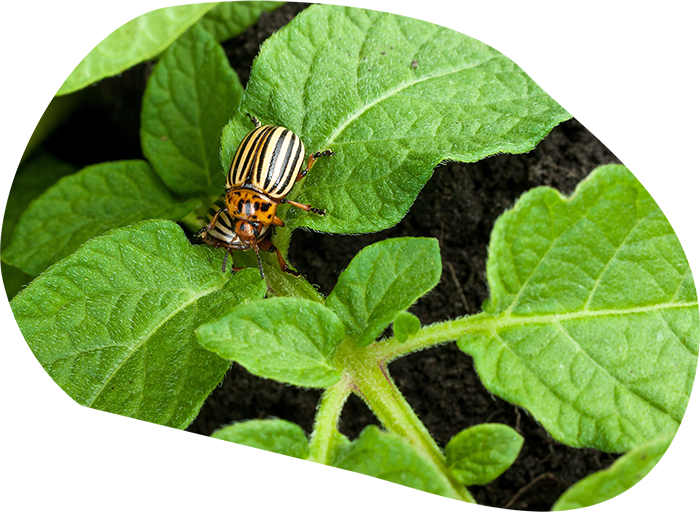 The Colorado Potato beetle is a yellow beetle with black stripes running along its back. These beetles are present in all provinces and territories in Canada and they attack species of the ‘nightshade’ family of plants. These include tomatoes, peppers, and potatoes. The beetles will lay their small bright orange eggs on the underside of the leaves and the beetles as well as the newly hatched larvae will feed on the potato leaves. If left unchecked this can quickly cause catastrophic damage to the plants. Be mindful when you start to see these critters on your plants as they multiply and spread rapidly. To reduce the impact of these beetles it is important to grow strong healthy plants. A healthy plant is less susceptible than a struggling one so keep the plants well watered, well fertilized and in the sun. The best way to deal with this pest is to kill the beetles when they first appear on the plants. Also, remove any leaves with eggs or larvae and dispose of away from the potatoes.
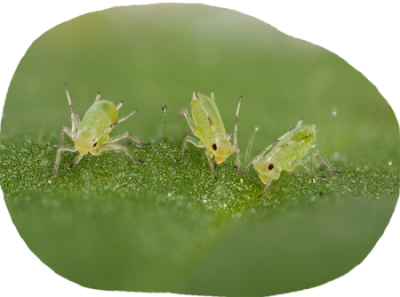 Aphids are a common pest for potatoes. These small green bugs will usually show up on the potato plants around early to mid August and if left unchecked can cause damage. Aphids extract sap from the plants and leave behind a residue call honeydew that can block sunlight, harbor mould and weaken the plant. Aphids also carry viruses that adversely affect potato plants and the yields. Common viruses transmitted by aphids include, Potato leaf roll and potato virus Y. Growing certified, virus free seed potatoes is a good preventative measure. If aphids do present themselves, a blast of water from the water hose every so often will knock them off the plant and set them back. You may also want to try spraying the plant with mineral oil or a natural insecticidal soap as a treatment. A natural enemy of the aphid, and a friend of the potato plant, is the ladybug whose main diet consists of aphids.
Wireworms are tough slender worms that attack germinating seeds, bulbs, roots and tubers underground. They are found in home gardens across North America and if left unchecked can cause significant damage. In heavy infestations, patches of the garden may not emerge properly and re-seeding may be required. Frequent cultivation of the soil is recommended to make the conditions less favorable for wireworm larvae and to expose them to the elements. Rotating crops also helps to reduce the impact of these worms. Potatoes also make good wireworm traps. If there is an area you suspect may be infested with wireworms you may try the following trick: Before planting the actual crop, cut a few potatoes and and poke a thin stick or old fork into it. Bury the potatoes in the ground, with the stick poking out of the soil, and wait 2-3 days. If wireworms are present they will have dug themselves into the potato. Remove the potatoes from the ground and discard properly. Now you are ready to plant. This should reduce the damage caused by these worms.
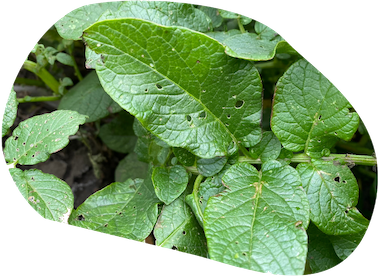
Tuber flea beetles are small black beetles about 2mm long that feed on potato plants. They typically hop but can also fly from plant to plant. You will know they are around when you see small holes appear in the leaves of the potato plants. The larvae however, cause the most damage as they feed directly on potato tubers. They are sometimes confused with the wireworm but potato flea beetle larvae are a lot smaller measuring up to 5mm long and 0.8mm wide. The larvae of the beetle causes the most damage in August when the tubers are starting to mature. The larvae will burrow into the new tubers and cause unsightly damage to the skin. The beetles will overwinter on the roots and debris of other crops and can be especially prevalent where crops are not rotated often. Keep in mind that other solanaceous plants such as tomatoes and egg plants can also harbour flea beetles. Rotate garden plots often, remove weeds, roots, and other organic debris after harvest to minimize populations. Growing tip; plant and harvest early to avoid peak larval activity in August.
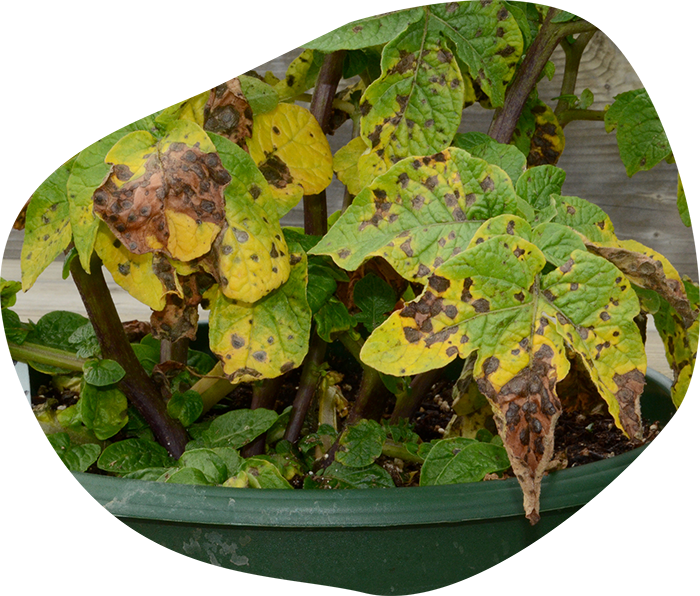 Alternaria solani, commonly know as early blight, is a disease which affects the leaves and stems of the potato plants and leads to the premature death of the plant. Symptoms to watch for are brownish spots forming on the leaves. Affected leaves will usually become light yellow and die off. This will shorten the life of the plant and result in decreased yields. To mitigate this problem make sure that the potato plants are well fertilized and hydrated. Most EarthApples varieties have good resistances to this form of blight.
Known as Phytophthora infestans, late blight is a disease that can destroy leaves, stems, and tubers of the potato. It is the infamous cause of the Irish potato famine of the 1840’s. Conditions conducive to late blight are warm and damp air, therefore inspect regularly when these conditions present themselves. To best prevent late blight keep container plants in well ventilated areas where the wind and sun can keep the leaves dry, and do not place pots too close together. For gardens, be extra vigilant when the canopies of the plants start to crowd together. Check the undersides of the potato leaves for late blight “spores,” which look like small whitish mould spots. To treat this fungus you may remove the affected leaves before the infection spreads. If the problem persists, you may want to try a foliage application of copper oxide on the leaves. This can also be done as a preventative measure during late blight weather conditions. For heavier infestations it is recommended to remove the infected plant and dispose of far away from healthy plants.
Scab is a soil borne disease caused by a bacteria-like organism in the dirt that affects the potato tubers and stems. It looks like rough, brown wart-like spots on the skin of the potatoes. This is more a looks problem than anything else because the potato is still safe to eat. To prevent scab avoid soils high in organic matter and fertilizers such as manure that have high organic content. Scab also forms when the soil is too dry especially when the potato starts to develop new tubers in the soil. Proper and timely watering is important.